Objectives
Replace the simple user and donation tracking with a database implementation - Mongo DB. Use the Mongoose ODM to create User + Donation models.
Lab 7 Solutions
routes.js
const Accounts = require('./app/controllers/accounts');
const Donations = require('./app/controllers/donations');
const Assets = require('./app/controllers/assets');

module.exports = [

  { method: 'GET', path: '/', config: Accounts.main },
  { method: 'GET', path: '/signup', config: Accounts.signup },
  { method: 'GET', path: '/login', config: Accounts.login },
  { method: 'POST', path: '/login', config: Accounts.authenticate },
  { method: 'POST', path: '/register', config: Accounts.register },
  { method: 'GET', path: '/logout', config: Accounts.logout },
  { method: 'GET', path: '/settings', config: Accounts.viewSettings },
  { method: 'POST', path: '/settings', config: Accounts.updateSettings },

  { method: 'GET', path: '/home', config: Donations.home },
  { method: 'GET', path: '/report', config: Donations.report },
  { method: 'POST', path: '/donate', config: Donations.donate },

  {
    method: 'GET',
    path: '/{param*}',
    config: { auth: false },
    handler: Assets.servePublicDirectory,
  },

];
app/views/partials/mainmenu.hbs
<nav class="ui inverted menu">
  <header class="header item"><a href="/"> Donation </a></header>
  <div class="right menu">
    <a id="home"   class= "item" href="/home"> Donate</a>
    <a id="report" class= "item" href="/report"> Report</a>
    <a id="settings" class= "item" href="/settings"> Settings</a>
    <a id="logout" class= "item" href="/logout"> Logout</a>
  </div>
</nav>

<script>
  $("#{{_id}}").addClass("active item");
</script>
app/views/settings.hbs
{{> mainmenu _id="settings" }}

<section class="ui raised segment">
  <div class="ui grid">
    <div class="ui ten wide column">
      <div class="ui stacked fluid form segment">
        <form action="/settings" method="POST">
          <h3 class="ui header">Register</h3>
          <div class="two fields">
            <div class="field">
              <label>First Name</label>
              <input value="{{user.firstName}}" type="text" name="firstName">
            </div>
            <div class="field">
              <label>Last Name</label>
              <input value="{{user.lastName}}" type="text" name="lastName">
            </div>
          </div>
          <div class="field">
            <label>Email</label>
            <input value="{{user.email}}" type="text" name="email">
          </div>
          <div class="field">
            <label>Password</label>
            <input value="{{user.password}}" type="password" name="password">
          </div>
          <button class="ui blue submit button">Save</button>
        </form>
      </div>
    </div>
    <aside class="ui five wide column">
      <img src="images/homer3.png" class="ui medium image">
    </aside>
  </div>
</section>
app/controllers/accounts.js
exports.viewSettings = {

  handler: function (request, reply) {
    var userEmail = request.auth.credentials.loggedInUser;
    var currentUserDetails = this.users[userEmail];
    reply.view('settings', { title: 'Edit Account Settings', user: currentUserDetails });
  },

};

exports.updateSettings = {

  handler: function (request, reply) {
    const user = request.payload;
    this.users[user.email] = user;
    reply.redirect('/settings');
  },

};
Mongo + Mongoose install
Visit the following site, locate the installation for your platform and install the MongoDB application:
A suitable distribution from here should suffice:
Additionally, install this simple UX for Mongo:
Typically, to launch the mongodb database service on your platform, first create a directory somewhere to store the database itself:
mkdir dbThen enter the following command to launch the service:
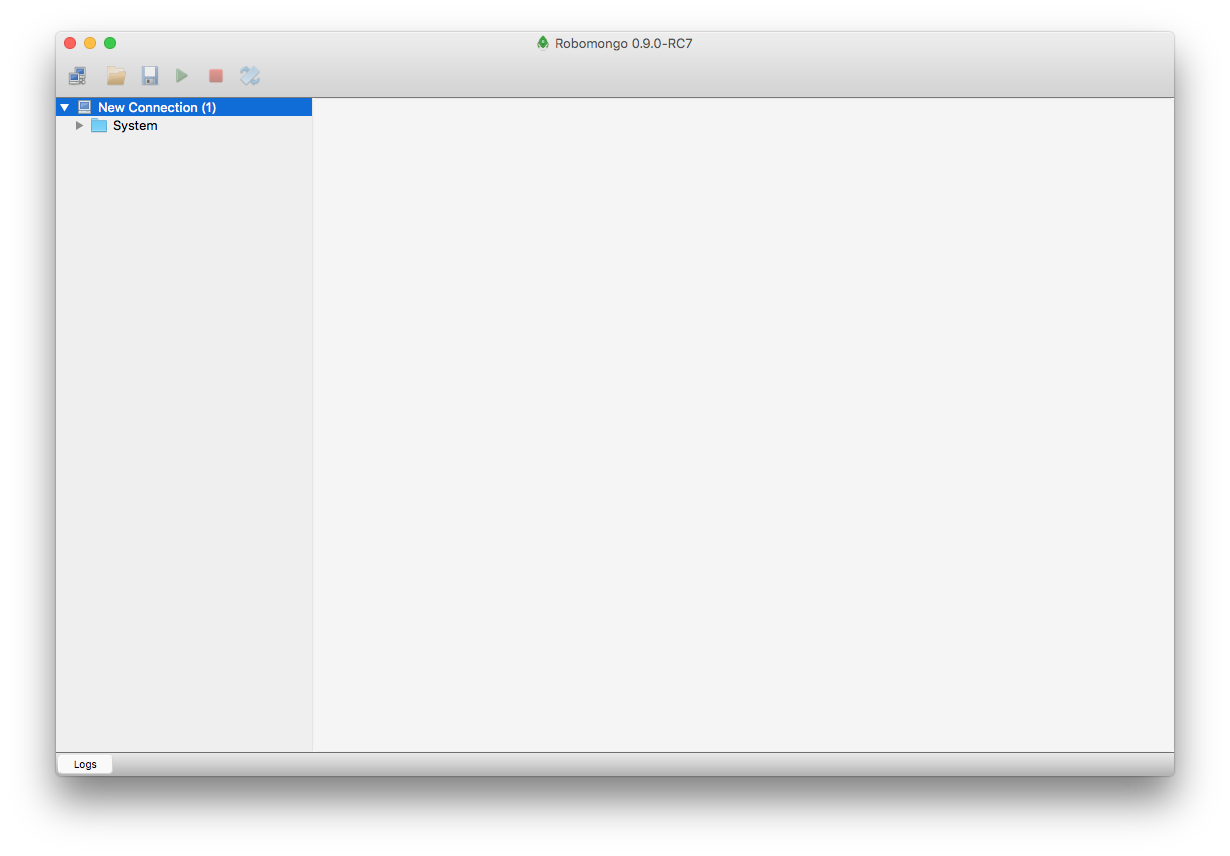
mongod -dbpath dbNow launch Robomongo:

.. and establish a default connection to the service you just started:
Connect to Mongo via Mongoose
Back within our project, we will be using the Mongoose library to interact with mongo:
To install the framework - run the following command in our project:
npm install mongoose -savepackage.json
{
  "name": "donation-web",
  "version": "1.0.0",
  "description": "an application to host donations for candidates",
  "main": "index.js",
  "scripts": {
    "test": "echo \"Error: no test specified\" && exit 1"
  },
  "author": "",
  "license": "ISC",
  "dependencies": {
    "handlebars": "^4.0.5",
    "hapi": "^14.1.0",
    "hapi-auth-cookie": "^6.1.1",
    "inert": "^4.0.1",
    "mongoose": "^4.5.8",
    "vision": "^4.1.0"
  }
}
Introduce a new folder called models into the app folder, and create the following file:
app/models/db.js
'use strict';

const mongoose = require('mongoose');

let dbURI = 'mongodb://localhost/donation';
if (process.env.NODE_ENV === 'production') {
  dbURI = process.env.MONGOLAB_URI;
}

mongoose.connect(dbURI);

mongoose.connection.on('connected', function () {
  console.log('Mongoose connected to ' + dbURI);
});

mongoose.connection.on('error', function (err) {
  console.log('Mongoose connection error: ' + err);
});

mongoose.connection.on('disconnected', function () {
  console.log('Mongoose disconnected');
});
This will establish a connection to the database.
index.js
In index.js, we can delete the exsiting server objects:
// server.bind({
//  users: {},
//  donations: [],
//});
.. replacing with an import of the db module we just created:
require('./app/models/db');Restart the app now - and we should see the following message on the console:
Mongoose connected to mongodb://localhost/donationIf you can see the mongod service - it should report a new connection when you run the app:
2016-08-05T09:15:26.916+0100 I NETWORK  [initandlisten] waiting for connections on port 27017
2016-08-05T09:15:35.150+0100 I NETWORK  [initandlisten] connection accepted from 127.0.0.1:49511 #1 (1 connection now open)
Introduce User Model
Introducing models into an application is a key step in may the application perform some useful function. We already have a models folder in our app - create a new module to represent a Schema for a User model:
app/models/user.js
'use strict';

const mongoose = require('mongoose');

const userSchema = mongoose.Schema({
  firstName: String,
  lastName: String,
  email: String,
  password: String,
});

const User = mongoose.model('User', userSchema);
module.exports = User;
The accounts controller can now require this model:
app/controllers/accounts.js
const User = require('../models/user');.. and in register we can save new users as they are registered:
exports.register = {
auth: false,
handler: function (request, reply) {
const user = new User(request.payload);
user.save().then(newUser => {
reply.redirect('/login');
}).catch(err => {
reply.redirect('/');
});
},
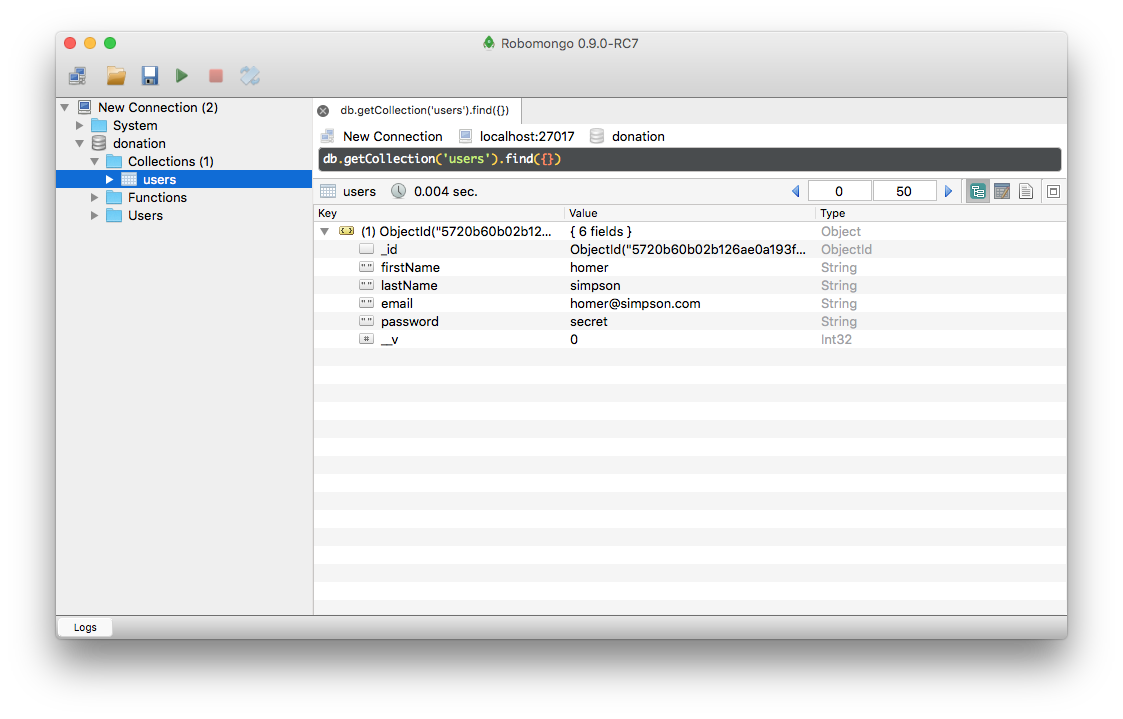
};Run the app now and register a new user. In Robomongo, make sure you can browse to the collection we have just created (you may need to refresh the view to see the updates)
The authenticate method will also need to be updated to consult the database when validating a user:
exports.authenticate = {
  auth: false,
  handler: function (request, reply) {
    const user = request.payload;
    User.findOne({ email: user.email }).then(foundUser => {
      if (foundUser && foundUser.password === user.password) {
        request.cookieAuth.set({
          loggedIn: true,
          loggedInUser: user.email,
        });
        reply.redirect('/home');
      } else {
        reply.redirect('/signup');
      }
    }).catch(err => {
      reply.redirect('/');
    });
  },

};
Try this now and verify that you can sign up, login and logout. Other aspects of the app are broken though.
You may notice the following on the console:
node:50475) DeprecationWarning: Mongoose: mpromise (mongoose's default promise library) is deprecated, plug in your own promise library instead: http://mongoosejs.com/docs/promises.htmlWe are using a promise syntax for database query and update - however the default promise support we are using is not intended for long term use.
We can turn on native ES6 promises instead, removing the warning. Place the following line in db.js:
app/models/db.js
mongoose.Promise = global.Promise;Place this just after mongoose is initialised:
const mongoose = require('mongoose');
mongoose.Promise = global.Promise;
Introduce Donation Model
This is a donation schema to represent individual donations:
app/models/donation.js
const mongoose = require('mongoose');

const donationSchema = mongoose.Schema({
  amount: Number,
  method: String,
});

const Donation = mongoose.model('Donation', donationSchema);
module.exports = Donation;
the donate and report routes can then be updated to use this model:
app/controllers/donations.js
const Donation = require('../models/donation');exports.donate = {
handler: function (request, reply) {
let data = request.payload;
const donation = new Donation(data);
donation.save().then(newDonation => {
reply.redirect('/report');
}).catch(err => {
reply.redirect('/');
});
},
};
exports.report = {
handler: function (request, reply) {
Donation.find({}).exec().then(allDonations => {
reply.view('report', {
title: 'Donations to Date',
donations: allDonations,
});
}).catch(err => {
reply.redirect('/');
});
},
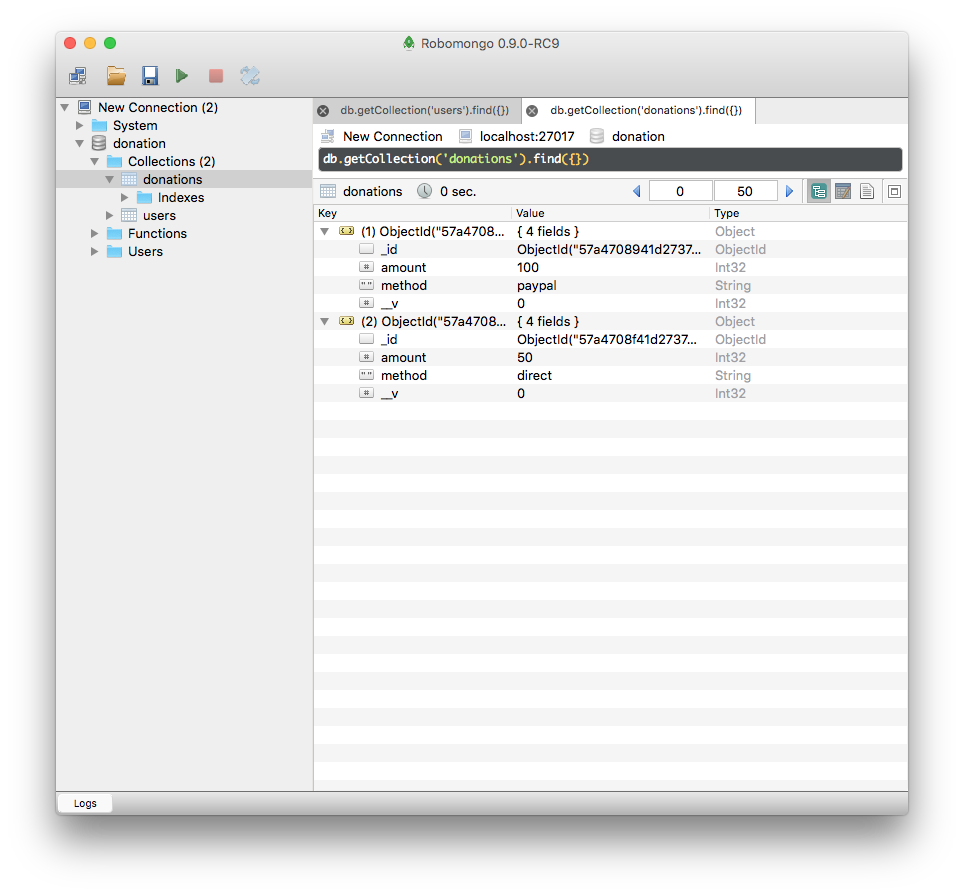
};Try this now and verify that you can make donations and view them in Robomongo:
Display Donor Email in Donations
We have lost the 'donor' column in the report field - as we are not recording this in the model yet.
Make this change to the donation schema model to store some information about the donor:
app/models/donation.js
const donationSchema = mongoose.Schema({
  amount: Number,
  method: String,
  donor: String,
});
When we create a donation, we will insert the currents users email as the donor:
app/controllers/donations.js
    let data = request.payload;
    data.donor = request.auth.credentials.loggedInUser;
    const donation = new Donation(data);
Finally, in our donationlist partial, display the donor string:
          {{#each donations}}
            <tr>
              <td> {{amount}} </td>
              <td> {{method}} </td>
              <td> {{donor}}  </td>
            </tr>
          {{/each}}
Run the app now and verify that the donors email is displayed (and stored). Note that the new donation model happily co-exists with the previous version.
Exercise
Archive of the project so far:
Exercise 1: Settings
The settings view is currently not functioning, as it is still tied to an earlier mechanism for tracking users:
exports.viewSettings = {

  handler: function (request, reply) {
    var userEmail = request.auth.credentials.loggedInUser;
    var currentUserDetails = this.users[userEmail];
    reply.view('settings', { title: 'Edit Account Settings', user: currentUserDetails });
  },

};

exports.updateSettings = {

  handler: function (request, reply) {
    const user = request.payload;
    this.users[user.email] = user;
    reply.redirect('/settings');
  },

};
Hints
viewSettings
This should be straightforward to correct. This line no longer makes sense:
var currentUserDetails = this.users[userEmail];Instead, we need to read from the database to get the user details, and then render these to the view (sending the user to the start page if there is an error):
    User.findOne({ email: userEmail }).then(foundUser => {
      reply.view('settings', { title: 'Edit Account Settings', user: foundUser });
    }).catch(err => {
      reply.redirect('/');
    });
updateSettings
This is more complicated - as we need to read a users details from the database, and then update with new values entered by the user. Here is a fragment that will accomplish this (without error handling) :
    User.findOne({ email: loggedInUserEmail }).then(user => {
      user.firstName = editedUser.firstName;
      user.lastName = editedUser.lastName;
      user.email = editedUser.email;
      user.password = editedUser.password;
      return user.save();
    }).then(user => {
      reply.view('settings', { title: 'Edit Account Settings', user: user });
    });
Note that we return a promise from the save() function - and then re render the updated user details to the settings view.